
Creating an Azure SQL Database
Contents
Introduction
In my previous articles on Azure, I give introduction about Azure SQL & its pricing model & various Service Tiers. In this article, I will tell you the steps of creating an Azure SQL Database as PaaS (Platform As A Service ). Azure SQL Database has some difference with the On premises SQL Server. I will going to explain details of many of these difference in my later articles of this series . Lets start the process of creating an Azure SQL Database

As a prerequisite, you must have your Azure account. If you don’t have your account, then you can create you free Azure subscription for a month. After the completion of your first month you can either cancel your subscription or continue with it. The beauty of Azure is that you will pay for what you use. Billing is done on the hourly basis which means you don’t be charged for the hours in which you don’t use any azure resources. You can create your free account for a month using the below Microsoft link. I will recommend the subscription Pay-As-You-Go for those you are learning Azure or want to do some R&D for self learning. Once you login into your Azure account you will see the following screen:-

In this Azure Dashboard, click on the link named “SQL databases” on the left hand side. It will open the page where list of all databases will be shown. Since no database has been created yet, there is no list of databases in the page as shown in the below screenshot.

Creation of Azure SQL Database
We can create a new SQL Database by either click on the “+Add” button on the top of the page or “Create SQL database” link as shown in the above screenshot. On clicking either of these link, below screen comes:
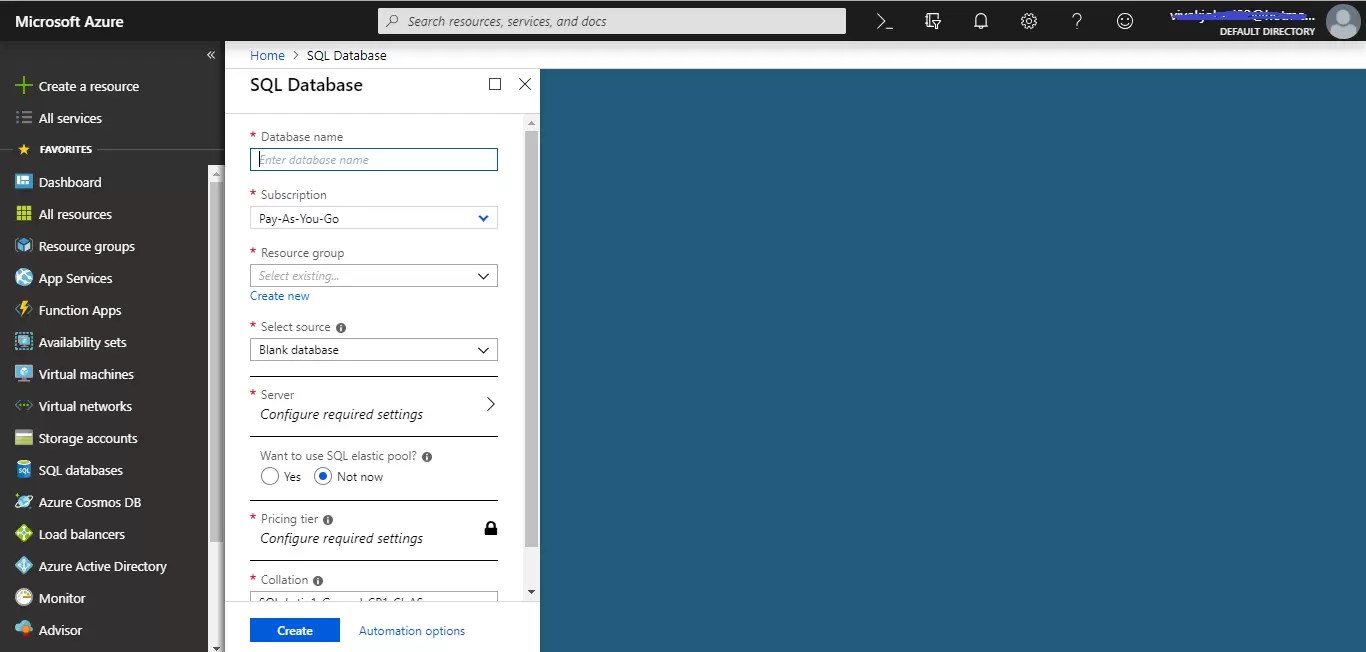
Step 1: Select Database Name
On the screen shown above, in order to create a new database, we need to select the database name, Resource group, Database source, SQL server and many other things which I will discuss during this article. Database name must be unique around all the existing Azure SQL databases in worldwide azure environment. It means no Azure SQL database with the same name should be existed already. But you doesn’t need to worry about it as Azure itself will check it when you type the database name in the text box. If any database with the same name already existed it will give the red signal. If not then it will give the green signal.
Step 2: Select Azure Subscription
The next text box will show the list of Azure subscriptions you have. If the user have multiple subscription then a drop down box is appear and user can choose any one subscription from the drop down list.
Step 3: Choose Resource Group
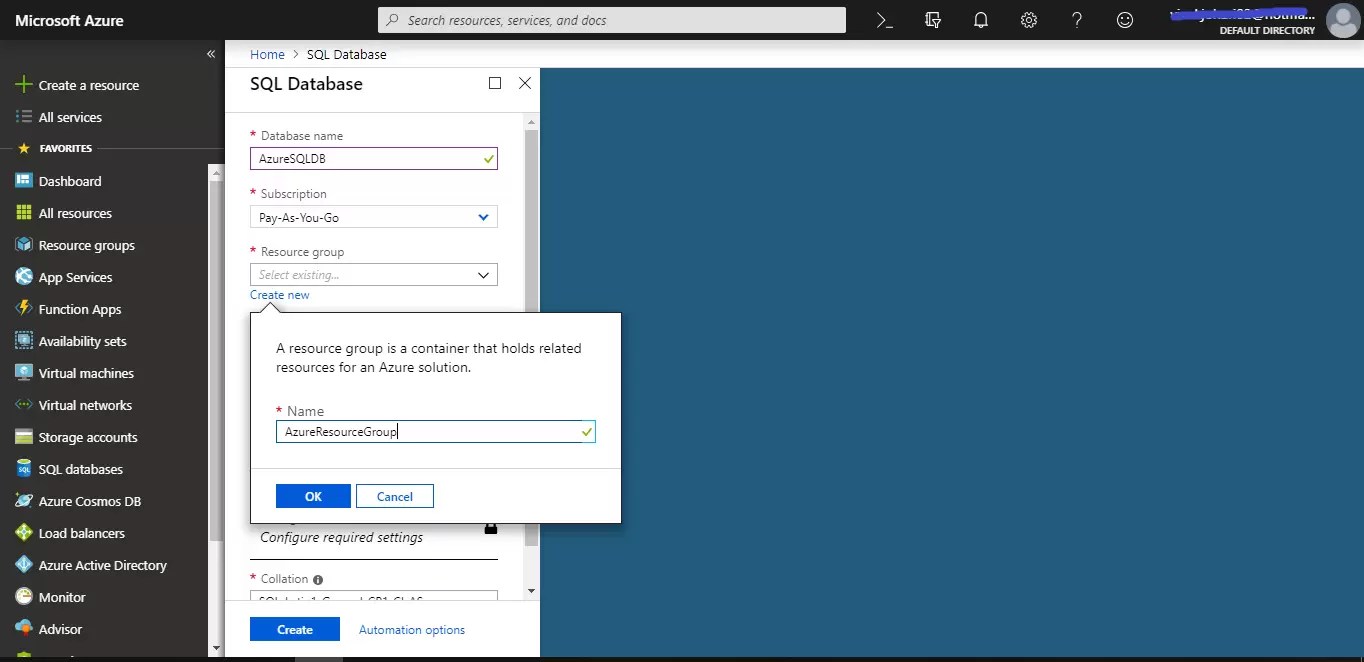
After that user needs to choose the name of the resource group which will contain the Azure SQL database. If user has multiple resource groups already, then user can select any of the resource group from the drop down list. If no resource group has been created yet, user can create the new resource group by clicking on the link “Create new“ as shown in the below screenshot:

In the above screen, user need to mentioned the name of the new Resource group in the text box “Name“. For example, if we want to create the resource group with name as “AzureResourceGroup“, then user need to mentioned this name as shown in below screenshot:
Step 4: Choose Database Source
After selecting the resource group, user need to select the database source from the 3 options mentioned in the drop down box.
- Blank Database: – To create a blank database
- Sample (AdventureWorksLT): – To create the AdventureWorksLT database
- Backup: – To create database using a backup file of a database
We will select the Blank database as database source for this article.

Step 5: Choose SQL Server
After selecting the database source, user needs to select the SQL Server. Again if user has access to multiple SQL Servers, then user can choose any of the these SQL Servers. But if user doesn’t have access to any of the SQL Server, then user need to create a new SQL Server. For this, user needs to click on the Configure required settings under the section Server as shown in below screenshot.

Here, user needs to choose the Server Name which should be unique throughout the Azure World wide environment similar to the way we choose the new database name. Also user needs to mentioned the SQL Server Admin login/ username and its password. After that user need to choose the location from available locations list from the drop down on which he wants his database to reside as shown in below screenshot. Here I choose West India as location.

Step 6: Choose Elastic Pool Option
Once the SQL Server is chosen, we need to decide whether we want to use the SQL elastic pool feature of Azure . I will tell about the SQL elastic pool in the later articles. For now, we will select the No option.
Step 7: Choose Service Tier for database
After that we need to choose the Service tiers like Basic, Standard or the Premium based on our database requirement like memory, No. of CPU & Disk IO etc. Base on the chosen Service tier, Azure decide its pricing. You can read more about these various service tiers and Azure pricing from the article Azure Pricing Models and Service Tiers. By default, Standard Service tier is mentioned. But we can change it according to our requirement as shown in below screenshots.

Click on the right arrow in Pricing tier to change it

Choose Basic Service tier and click Apply. After that user can choose the collation for its database if required. I will go with the default collation.

Step 8: Deployment of Azure SQL Database
Once the Validation is successful, click on the Create button. Once Create button is clicked below page comes showing the deployment process. This deployment process usually takes few minutes time to complete deployment.
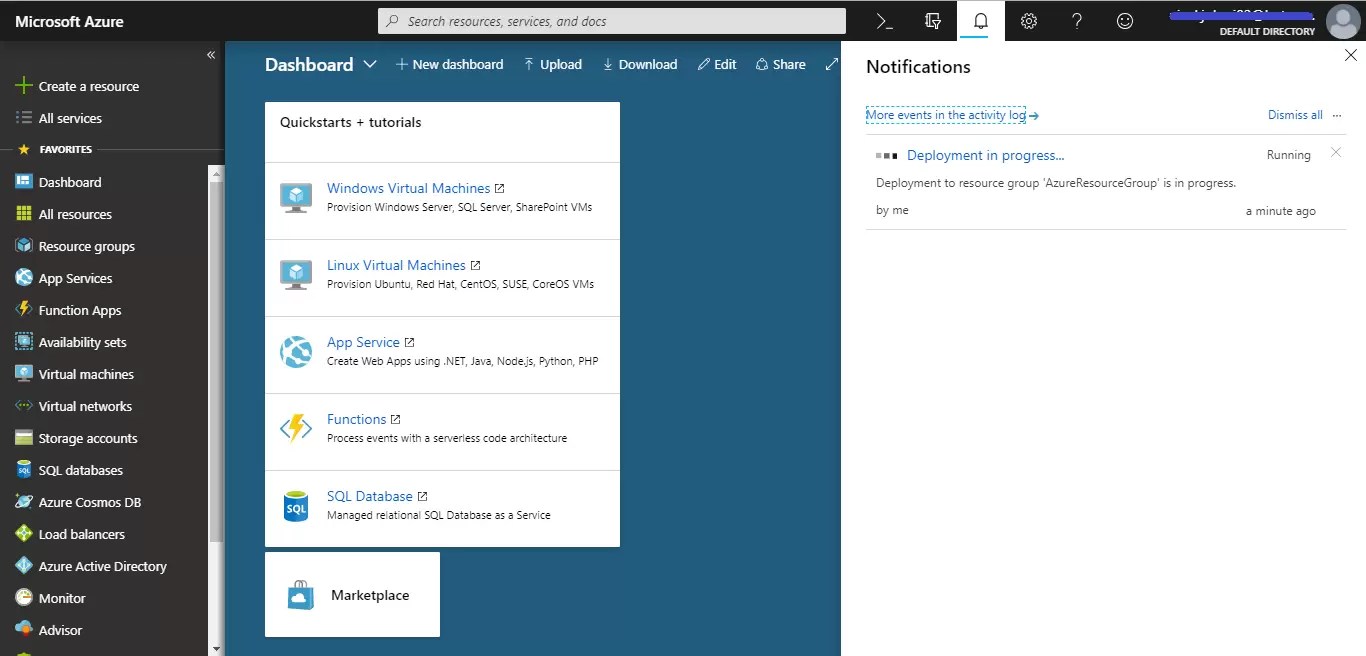
Once the SQL database is deployed on the Azure, user can Pin that database on its dashboard as shown in below screenshot.

Azure SQL Database Overview Page
Now we have created and deployed the Azure SQL Database on the cloud, we can see its properties by two ways
- Clicking on the pinned Azure SQL Database from the dashboard
- By first clicking on the SQL Databases on the left side link of dashboard and then click on the Database name from the list of available Azure SQL databases.
It will open the SQL Database Overview page as shown in below screenshots.
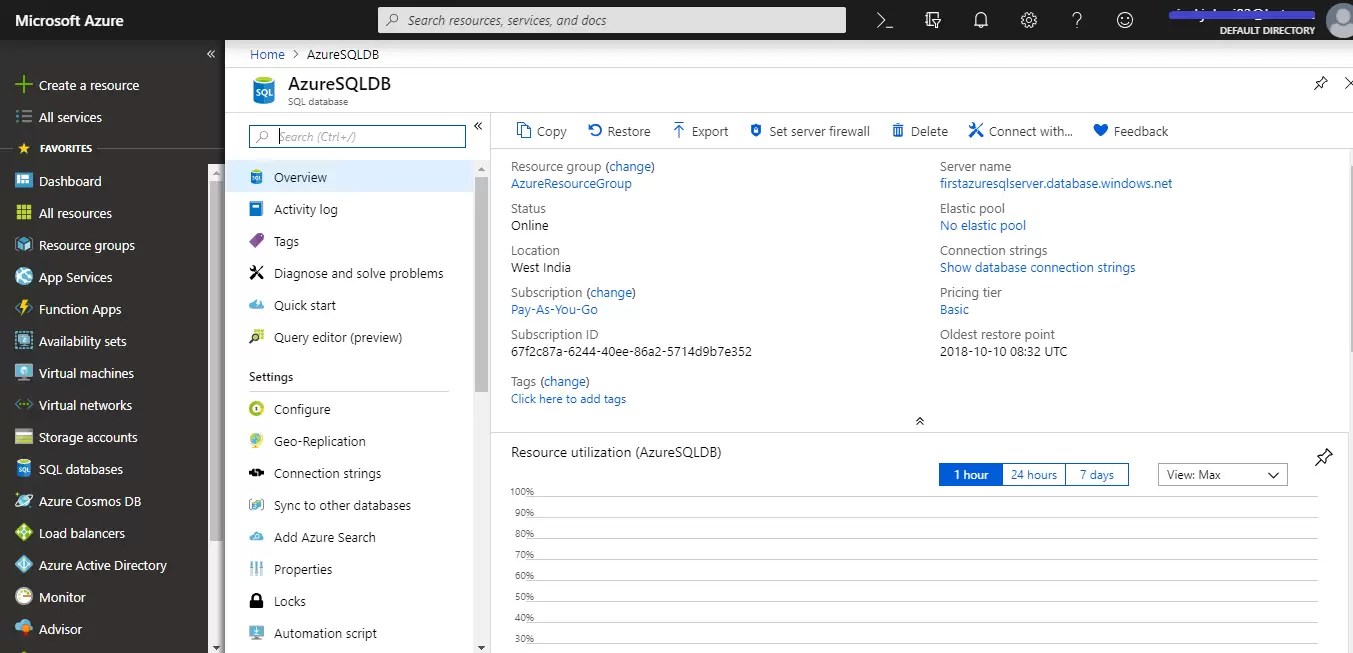
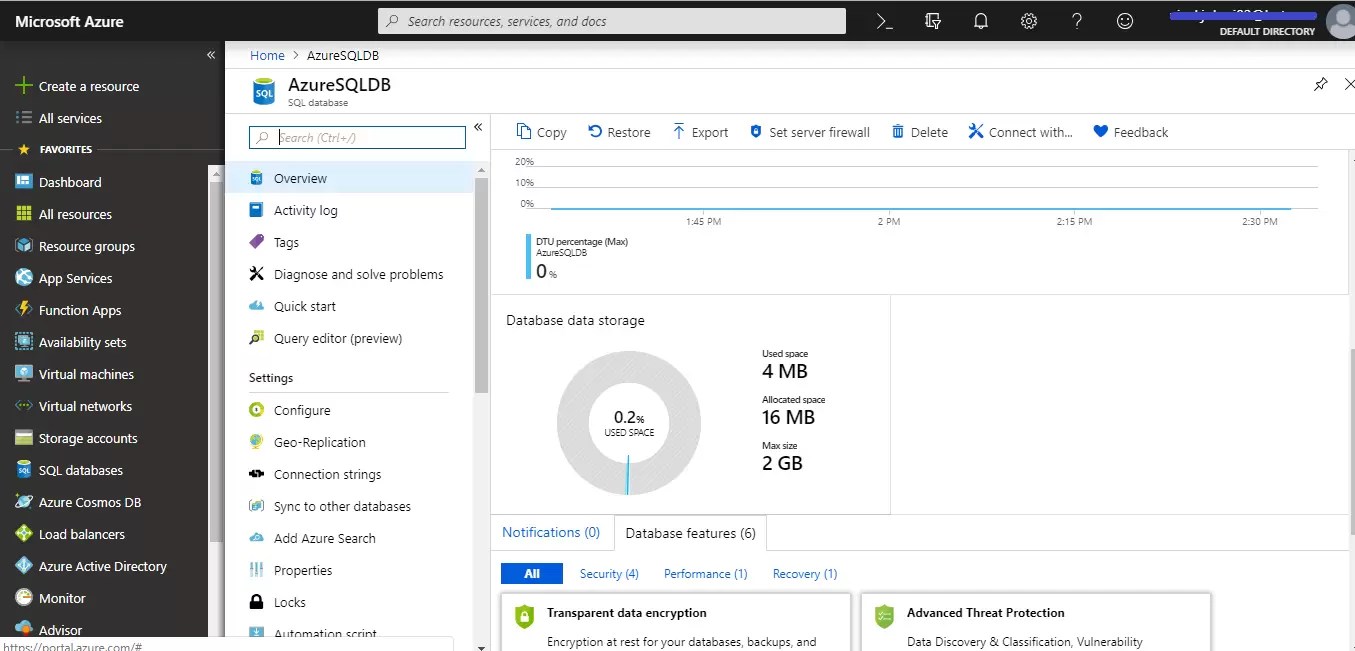
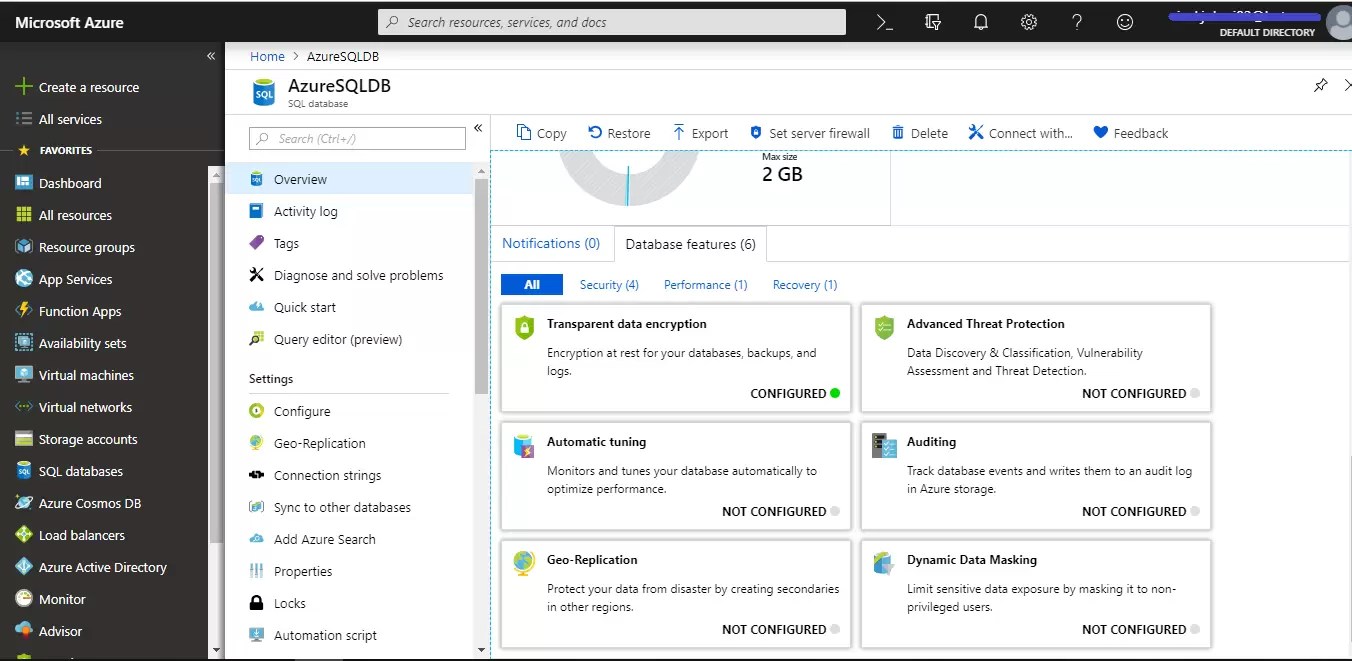
If you see, all above 3 screenshots are taken from the same overview screen. In the overview page, there are many links provided in the top like restore for restoration of database to a particular time, delete for deleting the database, setting SQL Server Firewall etc. Also this page gives many useful information like Database status, Location, Elastic Pool, Connection String, SQL Server Name, Resource Name, user subscription. It also gives information about the security features currently configured on it. For example, from the above screenshot, user can see that Transparent Data Encryption (TDE) is configured on it.
Summary
In this article, we have learned that how to create an Azure SQL Database as PAAS. It also tells the step by step process of Azure database creation . We also use many screenshots which help in better understanding of the this process. During our journey of database creation, we also try to give you the information of various fields which user need to choose or mentioned. It also gives you some details about creating a SQL Server .
Please don’t forget to gives your valuable comments for the article or you can send me the direct queries to my Email id askvivekjohari@gmail.com.
In the next article, we will tell about how to connect this database using the SQL Server Management Studio (SSMS).
Read More
Understanding Azure SQL Database- Introduction
Azure Pricing Models and Service Tiers
Discover more from Technology with Vivek Johari
Subscribe to get the latest posts sent to your email.


